We've converted to wordpress, and I think you will find it MUCH better!
All old posts have been converted...no need to come back here anymore...
Please update any bookmarks to point directly to www.raisinggeeks.com
Raising Geeks & Gear-Heads
THIS BLOG HAS MOVED. PLEASE UPDATE ANY BOOKMARKS TO GO DIRECTLY TO WWW.RAISINGGEEKS.COM
Sunday, August 28, 2011
Wednesday, July 20, 2011
Electronics Merit Badge: Class Night #3
We've been taking some of the Boy Scouts in Troop 6 through the Electronics Merit Badge. This night, we built the Electronics Merit Badge kit from www.electronicsmb.com, and did requirements testing.
Thanks to the Scouts - they were all prepared and did a GREAT job soldering their kits AND with their requirements testing. By the end of the night, we had 6 Scouts who had fully completed the requirements!
Thanks to the Parents who not only purchased the materials and gave their boys the opportunity, but also supervised their Scouts and helped with other Scouts.
Thanks to FamiLAB for loaning the soldering equipment, and to the FamiLAB members that helped prepare for the classes and instruct / supervise soldering.
Thanks to my friend and co-worker Jeff for also helping instruct, supervise, and take some photos (hey look - I'm in a photo!)
 |
| A quick inspection of a completed kit. This process allowed me to ask questions - they were completing requirements without even realizing it :) |
 |
| I used this kit from Radio Shack to demonstrate Binary using a BDC to 7-segment LED integrated circuit... |
 |
| Showing off his completed kit... |
 |
| He learned to solder AND built his kit AND did his requirements testing on the same VERY LONG night - Love the determination! |
 |
| This scout also learned to solder, built his kit, and completed his requirements testing. Great preparation! |
Sunday, July 17, 2011
TV Tennis kit from Radio Shack - built by an eight year-old
(Updated: HD Video of game play at the bottom of the post...)
While on over the July 4th holiday, I was in Radio Shack with a friend (yeah, that's what I do on vacation...) and I saw that they'd added the Velleman soldering kits at that store. When I saw the "TV Tennis Game" kit, I heard Phineas say, "I know what we are going to do today, Ferb!"
We worked together to finish adding the components and power to the PCB...
Then we mounted the battery pack and the feet...
While on over the July 4th holiday, I was in Radio Shack with a friend (yeah, that's what I do on vacation...) and I saw that they'd added the Velleman soldering kits at that store. When I saw the "TV Tennis Game" kit, I heard Phineas say, "I know what we are going to do today, Ferb!"
I'd grabbed my soldering gear on the way out the door to vacation so that the boys could try out the Electronic Merit Badge kits, but now I had something even more fun to build...AND we could play it at the "Retro Arcade" event that I was hosting with the FamiLAB crew at The History Center.
We opened the kit and spread out all the parts - then I setup all the soldering gear...
 |
| Instructions - better than IKEA... |
 |
| One day, I'll have my name on an integrated circuit...one day! |
 |
| Ready to build! |
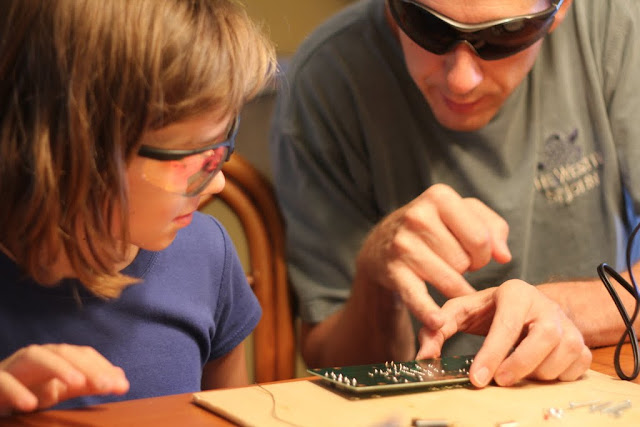
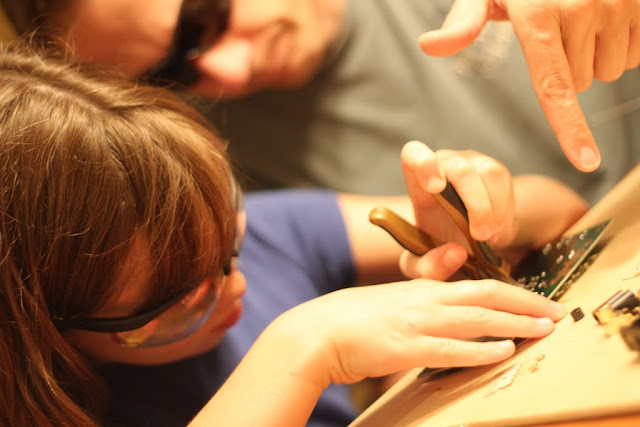
About this time, my friend's eight year-old daughter asks if she can help... My friend & I exchanged looks, and I said, "Sure!"
 |
| She started by handing me components, and before long was trimming component leads... |
 |
| She didn't want to solder, I think the fumes were concerning her, so I did the soldering with the cheap, portable iron... |
 |
| By this point she was placing components AND cutting leads... |
 |
| Showing how the PCB indicates diode direction... |
 |
| Making good progress...the components are well organized in the packaging, and the board layout is not complex... |
 |
| She's installing one of the up / down switches... |
 |
| She asked if she could solder...I thought her Mom was going to fall over... |
 |
| I do some basic demonstration... |
 |
| And help her solder those big legs on the switches... |
 |
| I need to pack kid-sized safety glasses...always... |
 |
| Letting her do the solder while I hold the iron... |
 |
| Now she's on her own - I'm stabilizing the board - the helping hands weren't helping, so I put my hands in the danger zone in the name of education! |
 |
| She's REALLY proud at this point... |
 |
| A good shot of all the siamesed pads on the PCB...and another shot of a proud girl... |
We worked together to finish adding the components and power to the PCB...
Then we mounted the battery pack and the feet...
 |
| A little continuity testing to be safe... |
 |
| Connected to the TV in the condo at the beach... |
 |
| The game kept starting on 1 Player mode Level IV - something was wrong... |
 |
| let me check the board... |
 |
| There it is - a lifted solder pad with a broken trace... |
 |
| Resoldering the connection and adding a jumper (component leg scrap)... |
 |
| Jumper installed... |
Once the game was repaired, we played for a bit, then took it to a few outings...one of the Electronics Merit Badge classes, and the Retro Arcade at The History Center...
 |
| TV Tennis game being played at The History Center's "Retro Replay"... |
 |
| Next time I'll have a fancier label :) |
Subscribe to:
Comments (Atom)


