I wasn't feeling great yesterday, so it was a good day to park myself in front of the computer and learn new software. I really want to be ready to go when the Prusa Mendel kit gets here...
The first piece of software I learned yesterday was OpenSCAD - the Programmer's Solid 3D CAD Modeller. Sounds perfect for me - I can't draw or sketch, but I can code (well, better than I can draw or sketch). There are many other options like Google SketchUp, Blender, etc. - but I really liked the idea of using code to generate the objects. I suspect SketchUp and OpenSCAD will be my tools of choice - If I have something crazy complex, I've got some friends that can use blender, solidworks, etc.
The below OpenSCAD code generated the 3D object on the right. This type of design is called Curve Stitching - you make curves from only straight lines. While it took me some time, you can see that it is very minimal code. If OpenSCAD supported variables inside loops, I would have been done MUCH quicker. Yes, I had to use GEOMETRY :) I've always used this design as my "HelloWorld" anytime I learn a new graphics library - I've done it on 8-bit devices, DOS low-level graphics, Widows primitives, Java, and even the graphing TI Calculators :)
OpenSCAD uses .scad files which are the code, and you can output into a number of formats, including STL which seems to be the file format of choice for 3D printing software.
Once I had the .stl file for my "thing", I hopped over to thingiverse and created an account. Thingiverse is a site for sharing 3D models destined for 3D printing. There is some AMAZINGLY cool stuff on the site, check out the "Popular Things" feed to see some of them. What is awesome is that people share the source files used to create the things, so that you can take and modify them however you like.
Here's my "thing" uploaded to thingiverse - I uploaded both the .scad file and the resultant .stl file. This way, someone who wanted to just print it could use the .stl, but someone who wants to modify the design or see how it is created can use the .scad - I love it.

Once you have a .stl file, you need to convert the model into GCode. GCode are the raw instructions like "turn on the heated print bed", "set the extrusion temperature to 90* Celsius", move to this position, extrude, move to this position, etc. There are several software options for this, two of them are skeinforge and repsnapper.
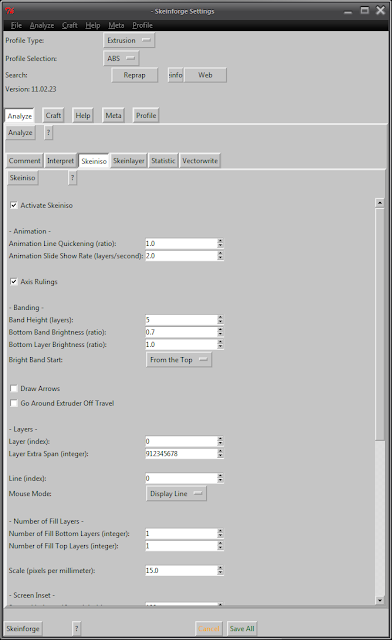
Here are some screenshots of both:
Skeinforge is python-based, so you see a python console window:

This is the main skeinforge settings & control window:
After converting to GCode, you get two visualization windows, SkeinLayer and SkeinISO. SkeinLayer lets you see how each later will get built and you can choose to animate to watch the build process.
This is what the final GCode output looks like...Skeinforge does not transmit the code to your printer, but there are other utilities for that...
Repsnapper is an all-in-one stl to gcode compiler, includes the visualizations in frame and can connect & transmit the GCode to the printer. It doesn't appear to have the raw configuration detail of skeinforge, but looks promising.
In the end, I can imagine that each software package has its own strengths & weaknesses. There are others like replicatorG (from Makerbot?) and the reprap java apps that I haven't looked at yet. As I mentioned before, this space is progressing at an amazing rate of change, so I'm sure that progress will be rapid. Just keeping up may be the hard part...


No comments:
Post a Comment